There are a few ways to do this. You can take advantage of the navigation pane in Word to rearrange sections by headings or use the tried-and-tested cut and paste approach instead. Here’s how to rearrange pages in Word using both methods.
Using the Navigation Pane
The easiest method to rearrange pages in Word is to use the navigation pane to move pages from A to B. Technically, this doesn’t allow you to move pages, but it does allow you to move entire sections if you’ve used headings to split up your document. This is a better method–if a section in your document carried onto multiple pages, but you only moved a single page, your document would no longer make any sense. As we’ve mentioned, this will only work if your document has been organized with headings applied using the Styles section in the Home tab on the ribbon bar.
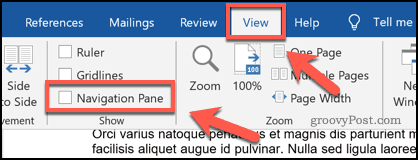
If your document doesn’t use headings, you’ll need to use the cut and paste method described below. To use the navigation pane to rearrange your document, you’ll first need to click on the View tab on the ribbon bar. Under the Show section, click the checkbox next to the Navigation Pane option.
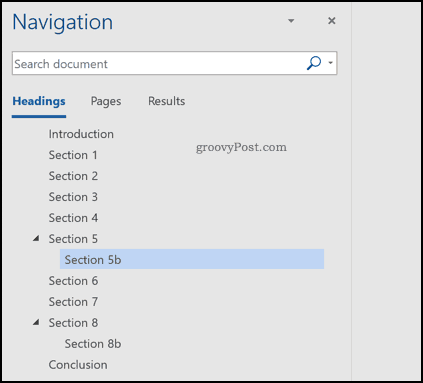
This will bring up the navigation pane in a menu on the left-hand side. You’ll see a list of your headings in the Headings tab. Main section headings made using the Heading 2 style will appear prominently, with sub-headings made with the Heading 3 and 4 styles shown underneath these.
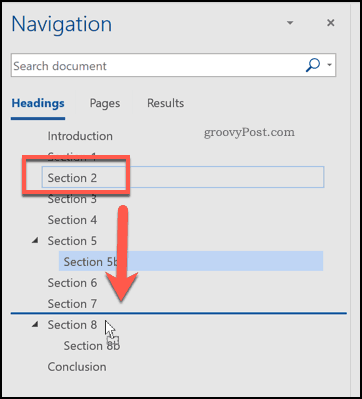
Clicking on any of these headings or sub-headings will bring you to the start of those sections in the editing screen. To rearrange any of these sections, use your mouse or trackpad to drag them into a new position in the navigation pane.
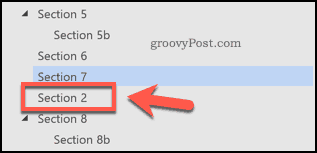
Once dropped, the heading and all of its content will be moved into a new position on your document. Section 2 of a sample document was moved below Section 7 in the navigation pane in the example below.
You can repeat these steps if you’re looking to move multiple sections.
Cutting and Pasting Pages in Word
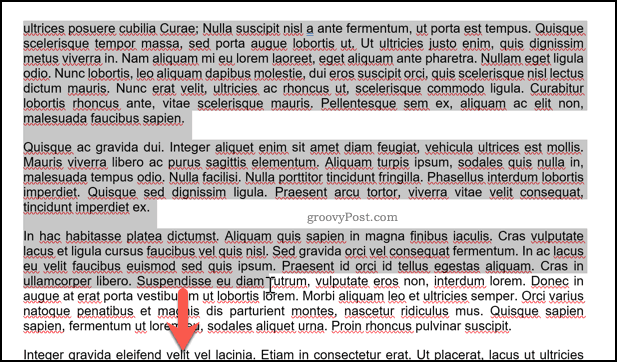
Using the navigation pane to move sections by their headings only works if you’re using headings in your document. Word doesn’t offer an easy, built-in option to easily rearrange pages if you don’t use headings. The only way to do it is to cut and paste the text and manually rearrange it instead. To do this, find the starting position for the content you’re looking to move. If this is at the start of a page, place your blinking cursor there. Using your mouse or trackpad, drag your cursor down to select the text you want to move.
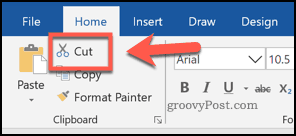
You’ll need to cut the selected text next. Press Ctrl+X on your keyboard, or press the Cut button in the Home tab on the ribbon bar instead.
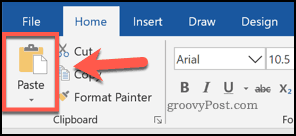
This will remove the text and place it on your clipboard. You’ll need to place the blinking cursor in a position to paste your content next. Once the cursor is in place, press Ctrl+V on your keyboard to paste it back into your document. Alternatively, press the Paste button in the Home tab on the ribbon bar.
The section you cut will appear in its new position immediately following the blinking cursor. You can repeat this to change the layout of your document further, should you need to.
Building a Better Document in Word
If you want to know how to rearrange pages in Word, you may have already forgotten the golden rule of document creation—planning. These methods will help you out change a document layout after it’s already been created. You might want to consider some methods for building better Word documents in the future, however. One option is to use building blocks in Microsoft Word to help you create templates for documents you create regularly. If you’re editing a document, take advantage of Word keyboard shortcuts to quickly make changes.
![]()


